Filling a cake is a pretty straightforward task, but I thought this guide might be helpful to people who are just learning to work with layer cakes.
Please keep in mind that this is just my way of doing it. As you practice, you will become more and more comfortable with the process and figure out what works for you and what doesn’t. This is a starting point, so just focus on having fun!
So, without further ado:
A step-by-step guide penned by Kaitlin and photographed by P.
Materials
- Offset Spatula(s)
- Spoons or knives may cut it when it comes to frosting cupcakes, but these are the way to go when it comes to frosting cakes. They’re available in a variety of sizes and shapes, but I think the best two to have in your arsenal are the 8″ model and the 13″ one.
- Serrated Knife
- These are the best tool for splitting cakes. I recommend a long, thin, sturdy blade like this one. You don’t need to spend a lot of money, but be aware that a flimsy knife will bend and make your cake slices convex/conical.
- Dishers/Portioners/Ice cream scoops
- If you don’t have one of these, a large spoon will get the job done, but these will help you put an even amount of frosting between each layer. I’m using a #24 (1 1/3 oz) scoop today.
- Serving Platter or Cardboard Rounds
- You need to eventually serve your cake on something, right? You can either frost your cake directly on a stand if you like (I got this one at Home Goods), or, if you prefer, frost it on a cardboard round and then transfer it to something else.
- Turntable
- I always use a turntable to frost cakes. It’s an unnecessary investment if you don’t frost cakes with any regularity, but if you do, you’ll be so happy if you buy one. Look for them at small cake supply stores – they usually sell them there cheaper than you can find them at craft stores. If you really, really don’t want to buy one, rig one up yourself like Alton Brown did in Season 6 Episode 15 of Good Eats.
- Non-Slip Pad
- Slip one of these under your cake on the turntable and you will thank me, I promise.
- Cake
- (Yeah, yeah – I know this and the next point are obvious, but I’m just covering my bases.) Always use chilled cake. I would advise against using frozen ones because they can be near-impossible to cut, but definitely make sure that they’ve been in the refrigerator for at least 3 or 4 hours. This will make them easier to handle because the cakes will be firmer and therefore less likely to crack and easier to halve (split).
- Frosting
- Use whichever kind you like – this technique is universal. Feel free to head over to my tutorials for Swiss Meringue and Italian Meringue, if you’d like some help with those, too!
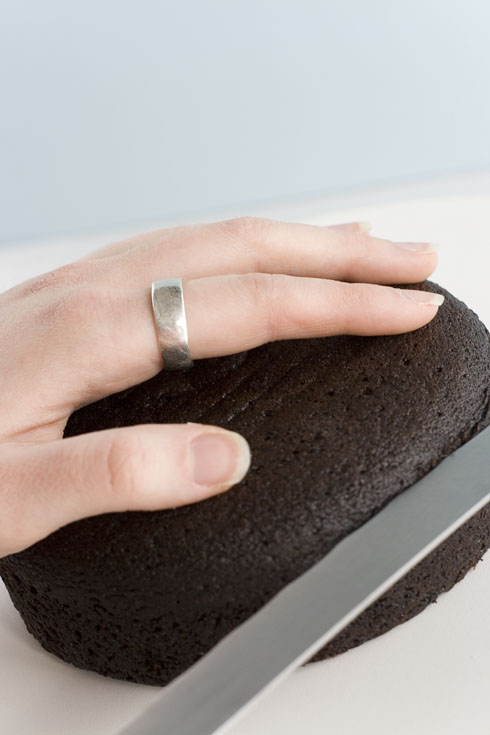
Place the first of your baked cakes on a turntable, dome side up. Using your hand to slowly turn the cake and the turntable, gently saw around the edge of the dome. In the first rotation, you don’t really want to cut too far into the cake – you just need to make a path for the knife to follow on the next pass.
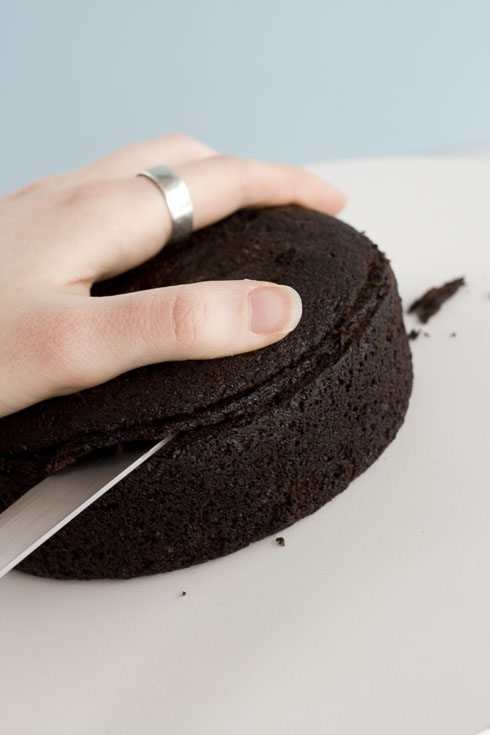
Turn the cake again and guide your knife carefully through the path you just cut. Saw gently back and forth as you do so, cutting about an inch toward the center on each side with every rotation. Be patient and go slow! Pay careful attention that you are keeping your knife completely horizontal. If you happen to get a little off track (as I did in the above photo) don’t fret; just try to realign the knife and keep sawing your way around the cake. Keep turning until you slice all the way through, then remove the dome and set aside. I’m sure you’ll find something to do with it.
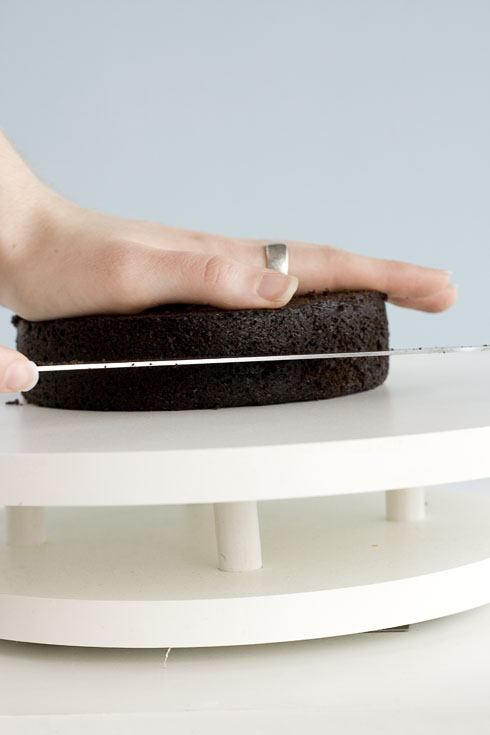
Place your hand, again, on the top of your newly-flattened cake. Place your knife halfway between the top and bottom on the side (estimating is fine – you’ll get better with practice) and use the same method to halve it as you did to cut off the dome. First make a path, then saw gradually as you turn the cake.
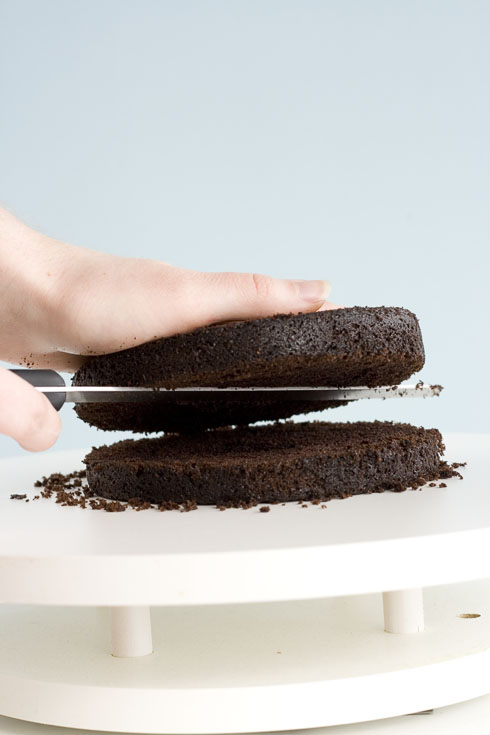
When you’ve finished halving, or “splitting” the cake, set the layers aside and repeat with your remaining cake round(s).
I like to frost directly on a cake stand, but, as I said before, some people like to frost their cake on cake rounds. Whichever is your preferred method, Be sure to place a non-slip pad between it and the turntable. Without it, your cake will slide all over the place and be impossible to frost.
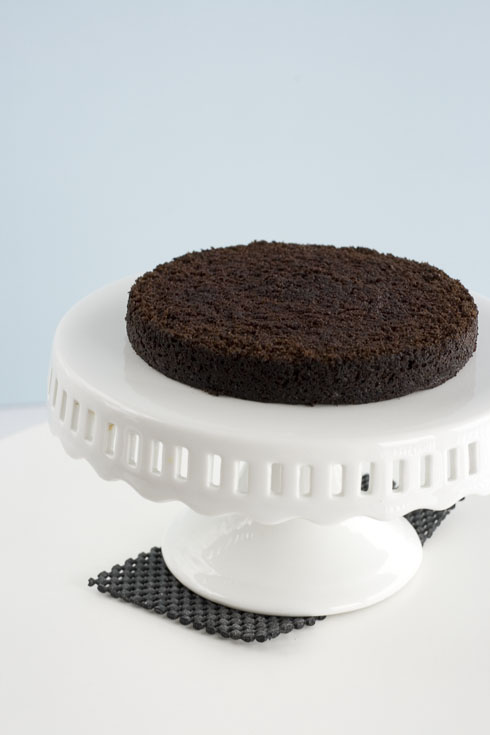
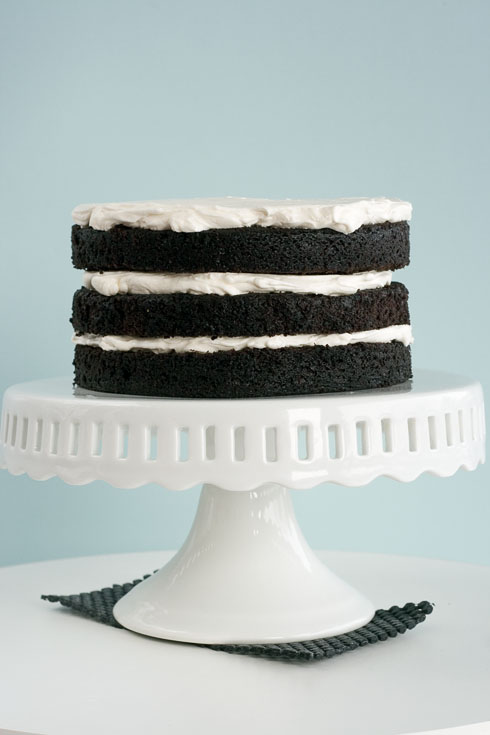
Once you’ve got everything set up, put down one layer of cake and prepare to fill.
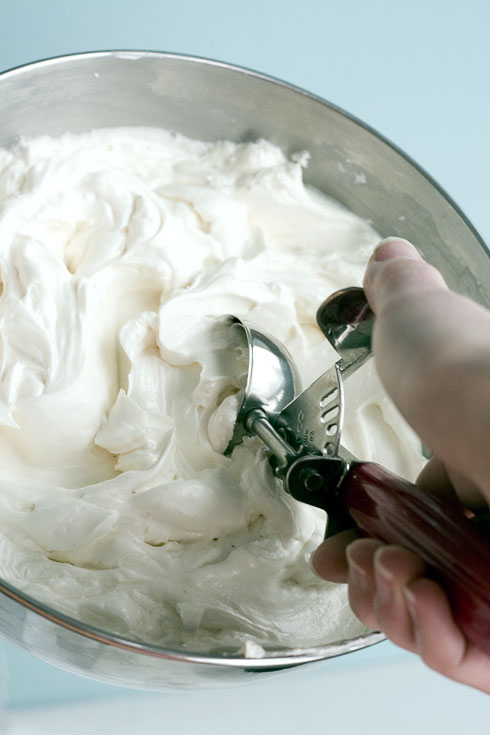
Like I said before, using a disher/portioner/ice cream scoop for this step allows me to get consistent amounts of frosting between each layer. This one is a #24 (1 1/3 oz), but the size isn’t terribly important. Just put on however much frosting you (or your guests) you like. For this cake, I dished 2 1/2 slightly mounded scoops out of the bowl…
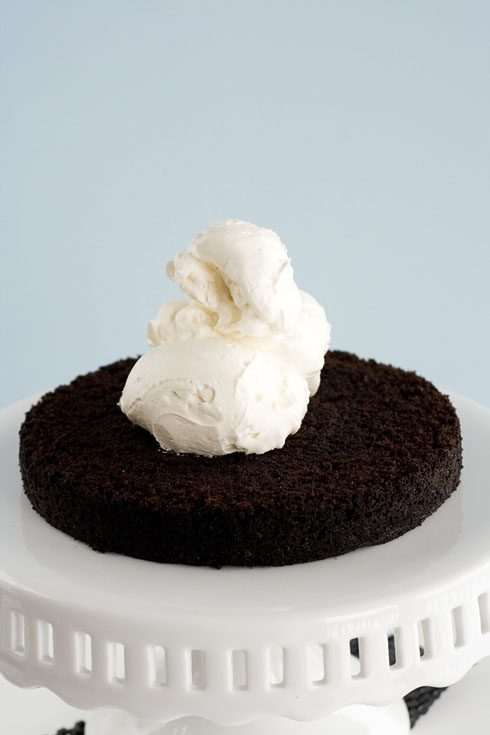
And onto the first layer of the cake. Try to pile them over the center of the cake so that it will be easier to spread them evenly.
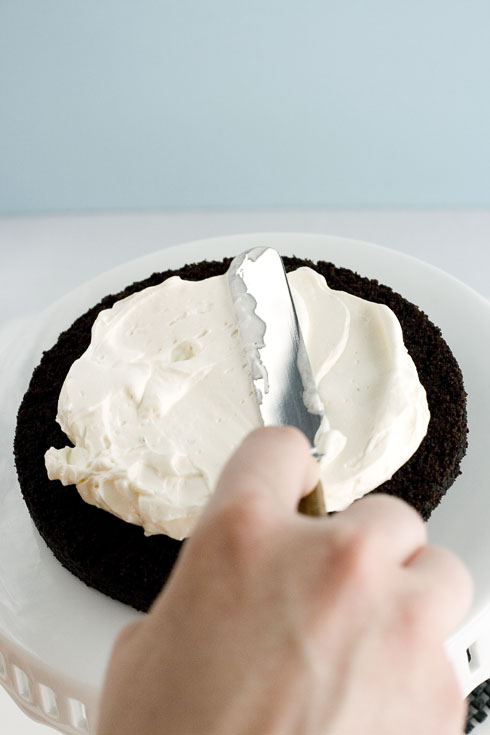
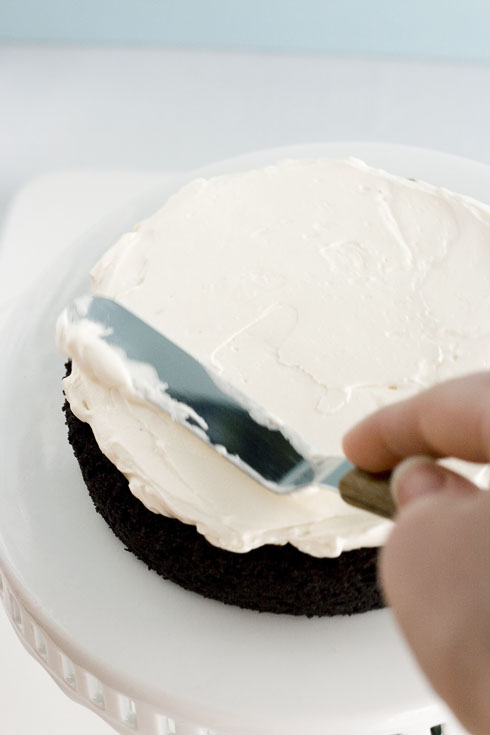
Place your spatula on the center of the frosting and gently push it down and out toward the edge, turning the cake to distribute. Think of it like rolling a pie crust; put more pressure on the center and work it out toward the edges without passing over them. As long as you keep the length of your spatula within the mound of frosting, no crumbs will find their way into it.
Also, whenever you need to remove your spatula from the cake, “sweep” it off by sliding it from one side of the frosting to the other, then off, in a fluid motion. If you lift it straight up, you’ll risk tearing the cake.
Try to make the frosting as smooth and level as possible so that your cake will be flat when stacked. After you’ve finished spreading the filling, carefully transfer another layer of cake over it and repeat the process with all but one layer of cake.
At this point you are ready to put on the final layer. Exciting, right?
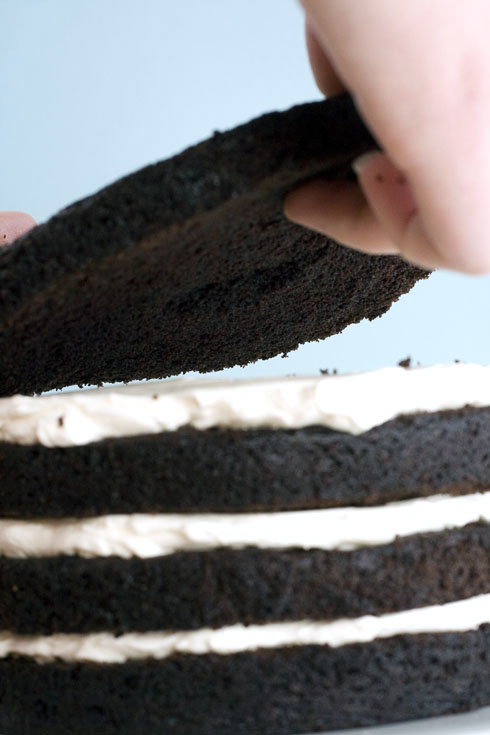
Carefully transfer the last layer over the frosting cut side down. This will help prevent excessive/unnecessary amounts of crumbs from getting into the final coat of frosting.
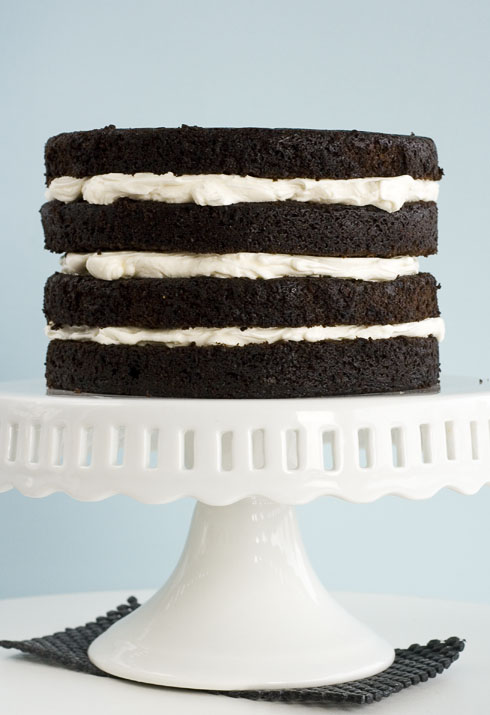
After the entire cake has been filled and stacked, it’s time to move onto crumb-coating and frosting…
Thanks for the help. I love the pictures! They bring the post to life. I really enjoy following your blog. 🙂
Thank you so much for this tutorial. I always have the tendency to tear my layers
Even though it looks simple but it really is tricky to assemble a cake. Thanks for sharing the process!
Awesome! And where did you get that lovely cake stand? My sister has one similar to that one, but she got it from HomeGoods, and I can't find that anywhere around here.
Great tips, thanks! Looking forward to the rest of the tutorial!
Nice, just in time for my daughter's bday! Thanks!
Great tutorial, Kaitlin!
Thank you! As always, your tutorials are fantastic (and beautiful)! Thank you for taking the time to explain a skill that most bloggers just skip right over 🙂
love it :)<br />thanks for sharing how simple things could be if i only wasn't a clutzy fool, ha<br />-meg<br />@ http://www.clutzycooking.blogspot.com<br />@ http://www.myscribblednotebook.blogspot.com
You couldn't have more perfect timing!!! I've been looking for some tips for making my husbands bday cake! Thanks!!
Great post and gorgeous photos 🙂
Thanks for the walk-though, although now I'll have a half finished layer cake in my kitchen for a week! haha
Your how-to looks great! <br /><br />As an additional trick, I use dental floss to cut cakes into layers. You need a piece that is long enough to get all of the way around the cake, wrap it around at the level in which you want to cut the cake, and then pull! It cuts through with such ease, and cuts right straight through (so long as you placed it straight). <br /><br />I'm excited to see
These are fab tips! Thank you. And now I want to make a little mini cake. Darling.
I'm so glad that you guys like and appreciate this tutorial! I'm very excited to post the second half. Lots of people have been asking for it!<br /><br /><b>@Dana</b>: I'm really excited to try that trick! Thanks for sharing!
Thanks for sharing!!! This step-by-step photos are really helping! Though I'm not sure if I can make it as nice as yours.
This is so helpful!! Thanks
Thanks!!<br />This can really help me improve.<br />Cant wait for the crumb coating tutorial! I really have problems with it :S<br /><br />Can you please make a tier cake tutorial in the future? :D<br />I've seen the birthday cake you made for your younger brother ( topsy turvy) and it looked really neat! :D<br /><br />W
Thanks so much for the tutorial! I'm just getting in to cake decorating and the tips will definitely come in handy!
Thank you so much for this. I've made loads of things on my blog but never a layer cake! This tutorial is fantastic!!!!
Great tutorial! <br /><br />The best cake tip I ever learned (from one of my chefs) was to not tap your metal spatula on the edge of the bowl to knock off excess icing (which I had a habit of doing). <br /><br />He said over time it would make tiny knicks in the spatula which is what causes little grooves to appear in your buttercream as you try and smooth it out. I had to throw away all my
What a fantastic tutorial. I'm so hideous at frosting cakes and end up with a big pile of goo and crumbs. You make it look effortless… Will be using this next time I attempt a cake. Can't wait for part two!
Great tutorial! Great photos! We'd love for you to share this at dishfolio.com!
This is great information. Thanks for sharing@
So making use of this for the wedding cake I'm planning.
I've always marveled at how you got your cake layers and frosting absolutely perfect (especially your rainbow cake!). This is a fantastic tutorial Kaitlin! Oh and brilliant photos too 🙂
This is so super great. I'm making a birthday cake for my dad's birthday and I can't wait to follow your instructions.
I have been reading your blog for a while now (love it!) and just saw it featured on Wedding Chicks, congratutions (:
Thanks so much, guys! <br /><br /><b>@Tara</b>: Unfortunately, when it comes to stacking cakes, I just kind of wing it 😛 Not much there for a tutorial! Haha<br /><br /><b>@Stella</b>: That is a good tip. I used to be bad about that, too 🙂
beautiful blog!!
Hola tienes un blog maravilloso.<br />Un trabajo precioso y unas fotos espectaculares.<br />Espero que te parezca bien que haya puesto tu foto, he citado tu blog y he puesto el link.<br />Si te molesta me lo dices y las quito.<br />Gracias.<br />Margot
Wow, this is fantastic! Thanks so much for breaking down the delicious steps like this. I would love to link to your tutorial if you didn't mind.
T H A N K Y O U S O M U C H !<br />I've been doing cakes for people's birthdays for a while because I'm good at making tasty cake heaven. However I was asked to make a wedding cake last week, and because she'd given me so little time it wasn't till I was icing the cake that I realised that I was terrible at getting a clean decorating finish on my cakes. it turned out ok,
I had the chance to use this technique twice this weekend and I am happy to report that the cakes look like a pro assembled them! Thank you so much for this easy to follow tutorial.
Thansk for the tutorial. It looks great.<br />The cake also looks delicius – is it a special kind of chocolate cake?
So glad you guys like it! <br /><br />Nanna, I used <a href="https://whisk-kid.com/2011/02/think-chocolate-cake-with-vanilla.html" rel="nofollow">this</a> recipe. My favorite chocolate cake 🙂
I will try it at once:-) Thank you
Thanks so much! This was super helpful for my first time.
This is a great tutorial. I love the photos – they just made me want to get into the kitchen right now (too bad i'm at work :)).
That looks sooo good! ELL x